Mastering Planes of the face: A Complete Guide to Painting Portraits with Depth

Introduction

Understanding the planes of the face is a fundamental skill for portrait artists. Whether you’re a beginner or an experienced painter, breaking down the face into geometric planes helps you simplify complex forms, control values, and create realistic lighting.

In this guide, I’ll walk you through my process of painting a portrait using planar analysis, combining classical techniques with modern approaches. I’ll also reference expert insights from renowned artists and anatomy books to deepen your understanding.


Why Study the Planes of the face?

Before diving into the tutorial, let’s explore why this method is so powerful:

1. Simplifies Complex Forms

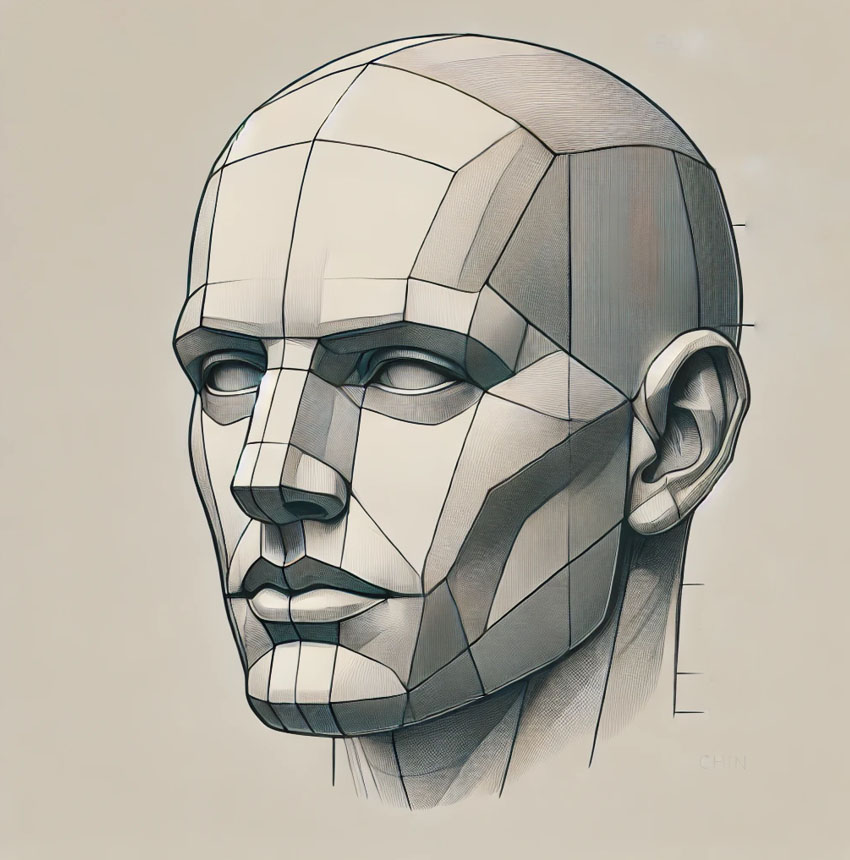
The human face is a three-dimensional structure, but beginners often struggle to capture its curves. By breaking it into flat planes (like a low-poly 3D model), we can focus on value transitions rather than getting lost in details.

“Think of the head as a series of blocks before refining it into curves.”
Andrew Loomis, Figure Drawing for All It’s Worth

planes of the face

2. Improves Light & Shadow Understanding

Planes of the face reacts differently to light:

  • Front-facing planes (forehead, nose bridge) catch the most light.
  • Side planes (cheekbones, temples) are mid-toned.
  • Receding planes (eye sockets, under the chin) stay in shadow.

“Light reveals form. If you can’t see the planes, you can’t paint the light.”
Steve Huston, Nuts and Bolts of Figure Painting

planes of the face

3. Used by Classical & Digital Artists

From Bridgman’s anatomy studies to modern 3D sculpting, planar analysis remains a core technique. Even Disney animators use simplified planes to maintain structure in stylized faces.


Step-by-Step Painting Process

Materials Used

  • Paints: Titanium White, Cadmium Yellow, Burnt Sienna, Cobalt Blue, Ivory Black
  • Brushes: Flat, filbert, and soft blending brushes
  • Tools: Palette knife, sponge for texture
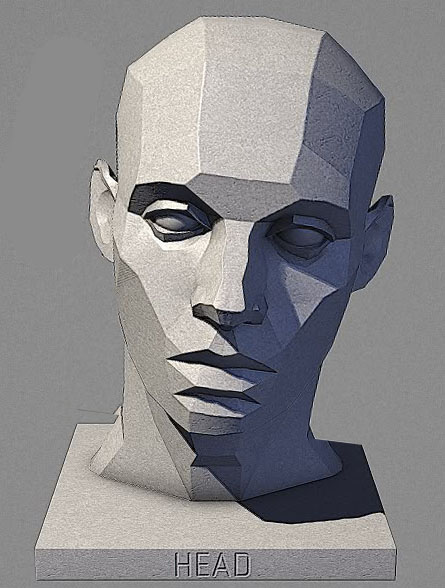
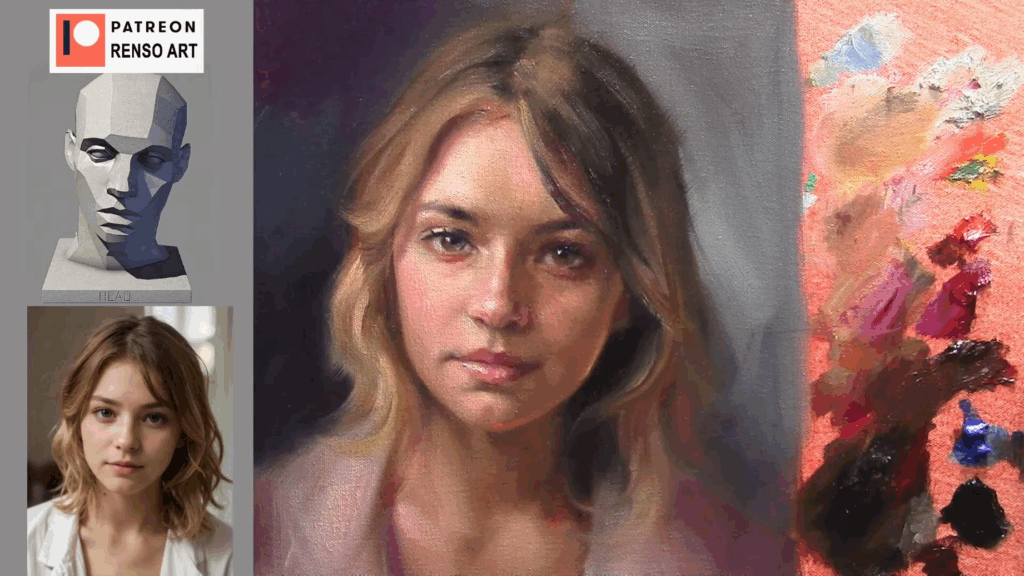
  • Reference: Sculpted head with clear planes (similar to Asaro Head model)

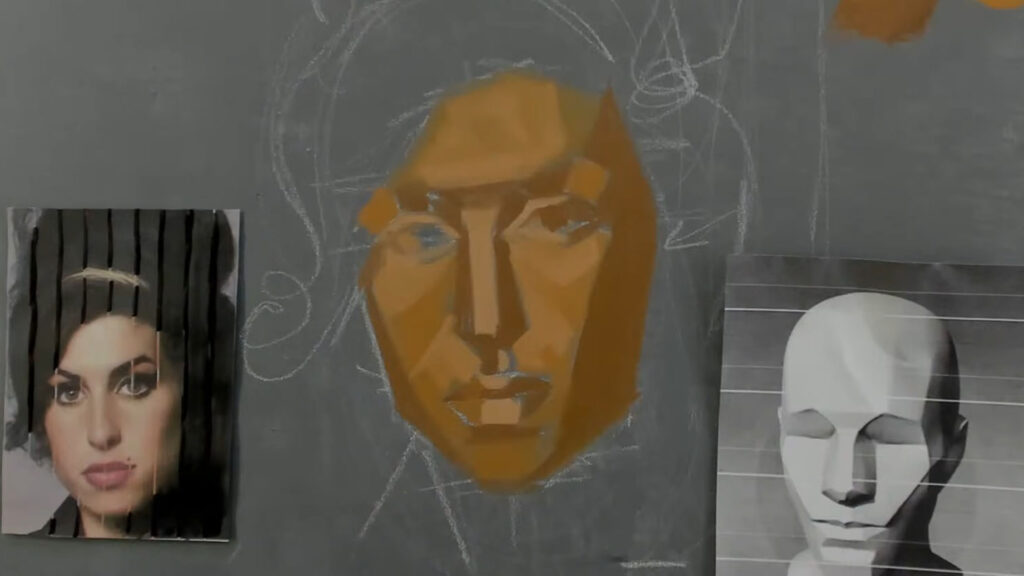
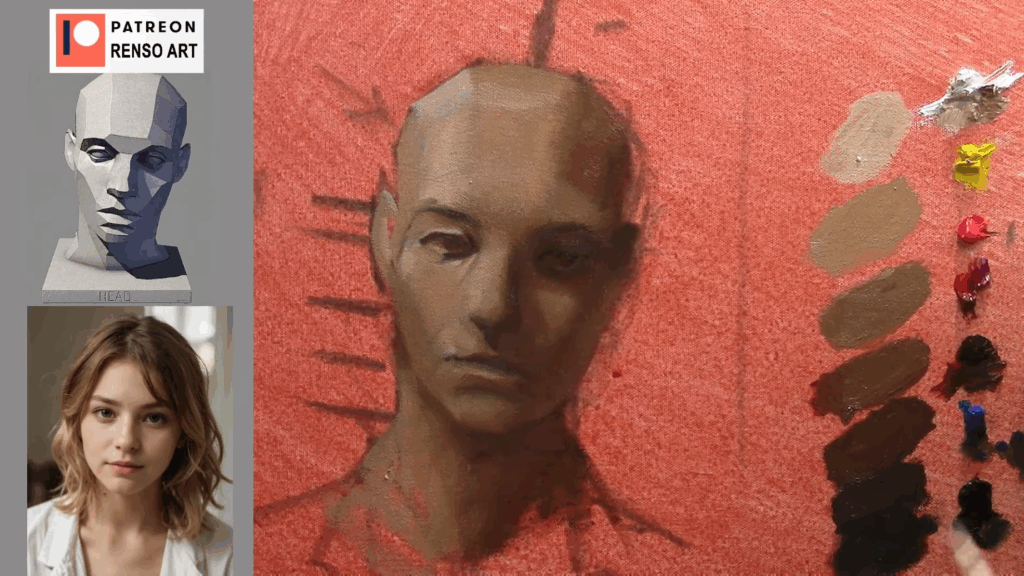
Step 1: Blocking in the Planes of the face

  1. Basic Structure
  • Sketch the egg-shaped cranium and jawline.
  • Mark the center line (adjust for tilt).
  • Place the eyebrows, nose, and mouth using the Loomis method (eyes at midpoint, nose at 1.5-eye-length down).
  1. Mapping Planes
  • Forehead: 3 main planes (center + two sides).
  • Nose: Pyramid-like structure with front, sides, and bottom.
  • Cheeks: Angular transitions from cheekbones to jaw.

Pro Tip: Use the Asaro Head model (a popular sculptural reference) to study the Planes of the face.
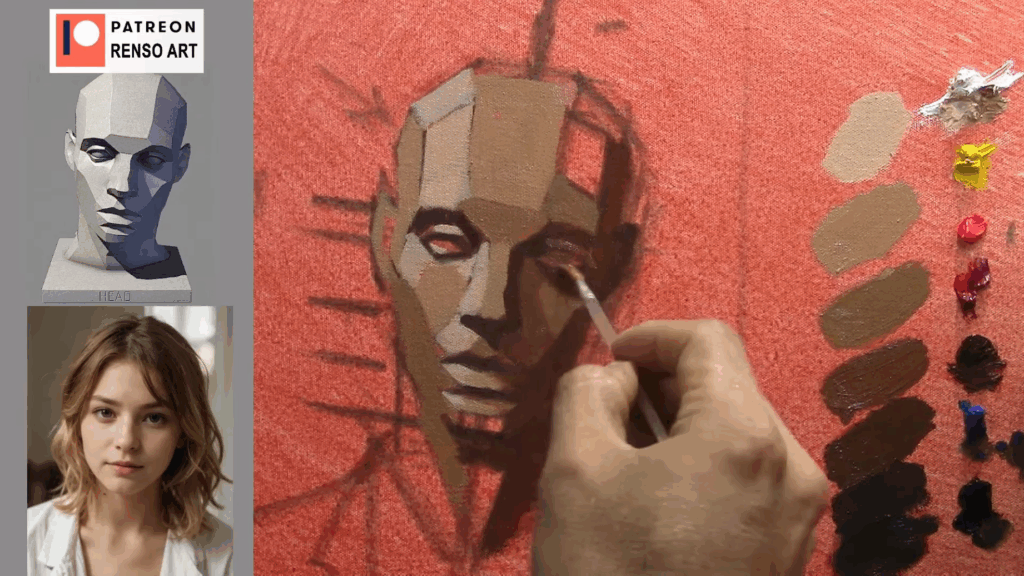
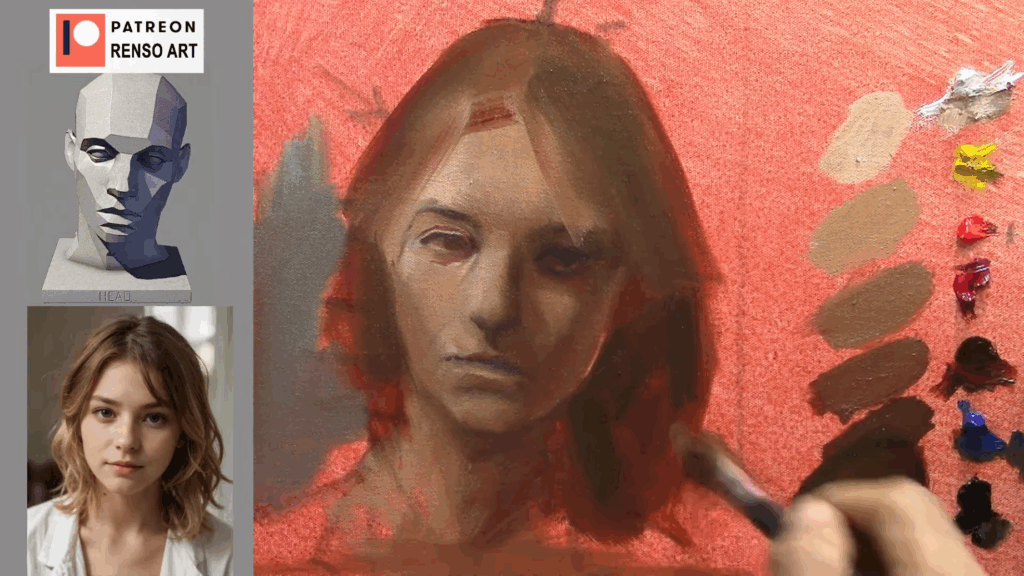
planes of the face

Step 2: Value Study

I mixed a 9-step value scale (from white to black) using Burnt Sienna and white, then darkened with blue/black.

Plane LocationValueColor Mix
Forehead (center)2 (light)White + touch of Burnt Sienna
Temples4 (mid)Burnt Sienna + white
Eye sockets7 (dark)Burnt Sienna + Cobalt Blue

🔹 Key Insight: Keep edges sharp where planes meet (e.g., jawline), but soften transitions on rounded areas (cheeks).

planes of the face

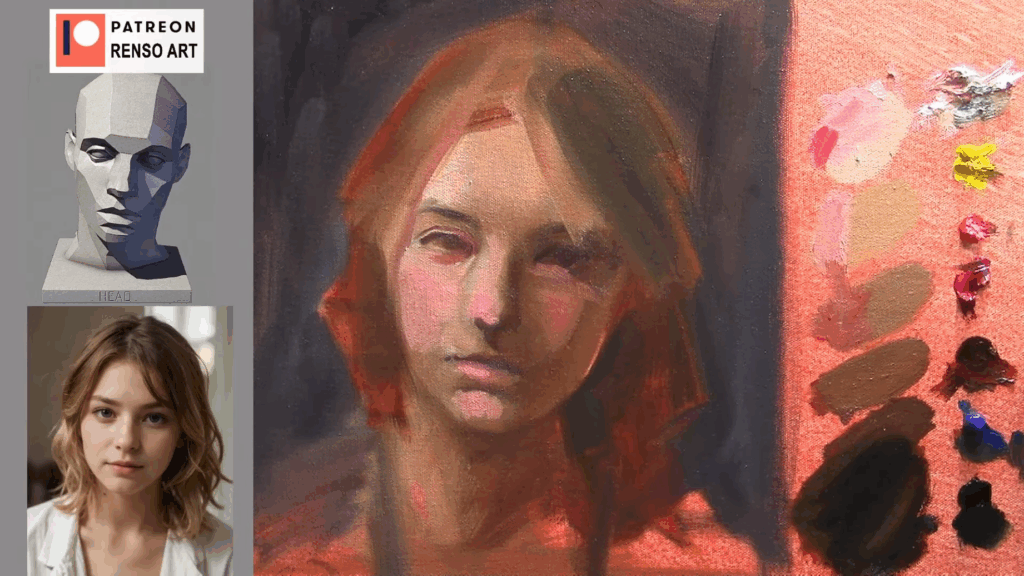
Step 3: Adding Color & Depth

While the underpainting was monochromatic, I introduced subtle color shifts:

  • Warm tones (red/yellow) on nose, cheeks, and lips.
  • Cool tones (blue/gray) in shadows for atmospheric depth.

“Shadows aren’t just darker—they’re cooler. Light isn’t just brighter—it’s warmer.”
James Gurney, Color and Light

planes of the face
planes of the face

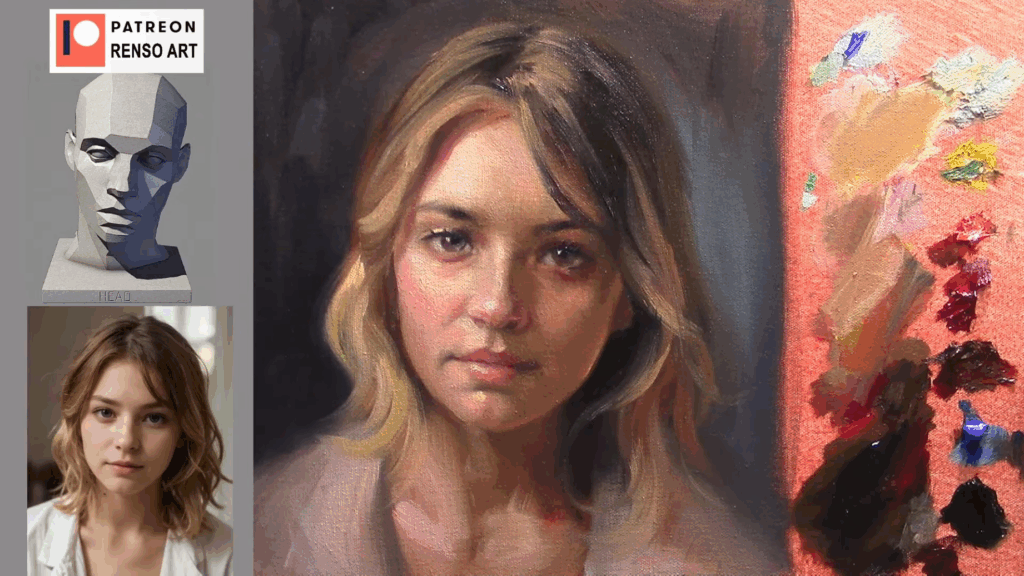
Step 4: Refining Likeness

  • Adjusted eye tilt (a common mistake in portraits).
  • Added subtle reflected light under the chin.
  • Used broken edges (soft + hard transitions) for realism.

🔸 Common Mistake: Over-blending flattens the form. Preserve some brushwork to maintain structure.

planes of the face

Advanced Tips from Professional Artists

  1. Dynamic Lighting (From Michael Hampton’s Design & Invention)
  • Try Rembrandt lighting (triangle highlight on one cheek) for dramatic volume.
  1. Digital Shortcut (For Concept Artists)
  • Use a planar brush in Photoshop to block values quickly.
  1. Sculptural Approach (From Gnomon Workshop)
  • Study skull anatomy to understand why planes exist (e.g., brow ridge, zygomatic arch).
planes of the face

Final Thoughts & Further Study of the Planes of the face

This exercise isn’t about one perfect painting—it’s about training your brain to see like an artist. For deeper learning:

  • Books: Bridgman’s Life Drawing, Hampton’s Figure Drawing
  • Models: 3D scan an Asaro Head (free downloads available).
  • Practice: Paint 10+ planar heads in different lighting.

Now it’s your turn! Grab a brush and start simplifying the Planes of the face. 🎨


The Planes of the Face: A Deep Dive into Portrait Painting

Alright, let’s get into it. Painting a portrait is like building a house—you need a solid foundation, and in this case, that foundation is the planes of the face. These planes are the flat and curved surfaces that make up the structure of a face. Think of them as the puzzle pieces that, when put together, create a realistic, three-dimensional likeness. But here’s the thing: it’s not just about drawing the eyes, nose, and mouth in the right place. It’s about understanding how light and shadow interact with those planes to give the face its form and depth. So, let’s break it down, step by step, and keep it casual while we’re at it.


Starting with the Basics: The Center Line

Every portrait starts with the center line. This is the imaginary line that runs vertically down the middle of the face, dividing it into two symmetrical halves. But here’s the kicker: faces aren’t perfectly symmetrical. One eye might be slightly higher, the nose might tilt a little, or the mouth might curve more on one side. So, while the center line is your guide, you’ve got to be flexible with it.

As I was working on this portrait, I kept checking the center line, the eye line, the nose line, and the mouth line. It’s like a constant dance—you’re always measuring, adjusting, and re-measuring. And don’t even get me started on the triangle formed by the eyes and the nose. That triangle is your best friend when it comes to getting the proportions right. If the triangle is off, the whole face feels wrong.


Studying the planes of the face is essential for understanding structure, form, and light in portrait painting. Breaking the face into simplified geometric planes helps in achieving depth and realism. Here’s a breakdown of the key planes:

1. Major Planes

These are the broadest divisions of the head, which establish the overall structure:

  • Front Plane – The face’s flat front surface.
  • Side Planes – The areas that wrap around from the temples to the cheeks.
  • Top Plane – The forehead and upper skull.
  • Bottom Plane – The underside of the chin and jawline.

2. Primary Facial Planes

These define the major shapes within the face:

  • Forehead Plane – Often divided into the upper, middle, and lower sections.
  • Cheek Planes – The prominent areas that catch light, shifting toward shadow at the edges.
  • Eye Sockets – Recessed areas that define the brow ridge and contribute to facial depth.
  • Nose Planes – The bridge, sides, and bottom of the nose have distinct planes.
  • Mouth Area Planes – The upper lip angles inward, while the lower lip has fuller, rounded planes.
  • Chin and Jaw Planes – These define the transition between the face and neck.

3. Light & Shadow Considerations

Understanding planes helps control how light interacts with the face:

  • Flat planes catch more light (like the forehead and cheekbones).
  • Angled planes create shadows (such as the sides of the nose and under the jaw).
  • Subtle transitions between planes give a realistic form.

How to Study the Planes of the Face

  • Use Asaro Heads (Planes of the Head models) for a simplified geometric approach.
  • Practice sketching faces in blocky, angular forms before softening into natural curves.
  • Use lighting from different angles to observe plane changes.
  • Sculpting (even digitally) can reinforce your understanding of form.

Mixing Colors: The Art of Skin Tones

Now, let’s talk about skin tones. Mixing the perfect skin color is like trying to find the right spice blend for a recipe—it’s all about balance. You start with a base color, something close to the person’s skin tone, but then you tweak it. A little more red for the cheeks, a touch of yellow for warmth, maybe a hint of blue for cooler areas like the shadows under the chin or around the eyes.

But here’s the thing: skin isn’t just one color. It’s a symphony of tones. The forehead might be a bit yellower, the cheeks pinker, and the shadows around the jawline cooler. And don’t forget about local color—that’s the base color of an object before light and shadow affect it. For skin, the local color is usually somewhere between peach, pink, and ochre, depending on the person.

I spent a lot of time mixing variations of the base color—lighter versions for highlights, darker versions for shadows, and more saturated versions for areas like the cheeks and lips. And sometimes, I’d throw in a wild card, like a touch of blue or green, just to see how it would affect the overall harmony. It’s all about experimentation.


Shadows and Highlights: Creating Depth

Shadows are where the magic happens. They give the face its three-dimensionality. But not all shadows are created equal. Some are warm, some are cool, and some are neutral. It depends on the light source and the surrounding colors. For this portrait, I kept the shadows relatively neutral, but I added a touch of warmth to areas like the nose and cheeks to make them pop forward.

Highlights, on the other hand, are all about catching the light. The brightest highlights are usually on the forehead, the bridge of the nose, the cheekbones, and the chin. But here’s a pro tip: don’t make your highlights pure white. Mix a bit of yellow or pink into the white to keep it natural.


The Eyes: Windows to the Soul

The eyes are the focal point of any portrait. They’re what people look at first, so you’ve got to get them right. But here’s the thing: eyes aren’t just white with a colored iris. They’re full of subtle colors and reflections. The whites of the eyes, for example, are rarely pure white. They’re usually a bit gray or yellowish, especially in shadow.

I spent a lot of time on the eyes, adding tiny highlights to make them look alive. And don’t forget the eyelids—they’re warmer and more reddish than the rest of the skin because they’re thinner and have more blood vessels. But you’ve got to be careful not to make them too red, or it’ll look like the person has been crying.


The Nose and Mouth: Balancing the Features

The nose and mouth are just as important as the eyes, but they’re often overlooked. The nose, for example, has its own set of planes—the bridge, the sides, the nostrils, and the tip. Each plane catches light differently, so you’ve got to pay attention to the transitions between light and shadow.

The mouth is another tricky area. It’s not just a line with some color inside. It’s a complex shape with its own highlights and shadows. The upper lip is usually darker than the lower lip, and there’s often a subtle highlight on the lower lip that gives it a moist, natural look. And don’t forget the corners of the mouth—they’re usually a bit darker and can add a lot of expression to the face.


Hair and Background: Framing the Face

Hair can make or break a portrait. It’s not just a mass of color—it’s made up of individual strands that catch light and create texture. But for this portrait, I decided to keep the hair relatively simple. I didn’t want it to distract from the face. Instead, I focused on getting the shape and volume right, adding a few highlights here and there to suggest movement.

The background is another important element. It’s not just empty space—it’s part of the composition. I added a bit of yellow to warm up the background, but I’m not sure if I’ll keep it. Sometimes, a neutral background works better because it keeps the focus on the face.


Knowing When to Stop

Here’s the hardest part of painting a portrait: knowing when to stop. It’s so easy to keep tweaking and adjusting, but at some point, you’ve got to step back and say, “It’s done.” Overworking a painting can ruin it. You start losing the freshness and spontaneity that make it come alive.

I’ve learned to trust my instincts. If something feels off, I’ll fix it. But if it feels right, I’ll leave it alone, even if it’s not perfect. Because here’s the thing: perfection is overrated. What matters is capturing the essence of the person—their expression, their personality, their soul.


Final Thoughts

Painting a portrait is a journey. It’s about more than just getting the proportions and colors right. It’s about capturing a moment, a feeling, a story. And the planes of the face are your roadmap. They guide you through the process, helping you build the structure, add the details, and bring the face to life.

So, next time you’re painting a portrait, take a moment to study the planes of the face. Pay attention to how light and shadow interact with them. And most importantly, have fun with it. Because at the end of the day, painting is about expressing yourself and connecting with the world around you.

Happy painting! 🎨