
Struggling with your portraits? You might find my E-book helpful. Click here
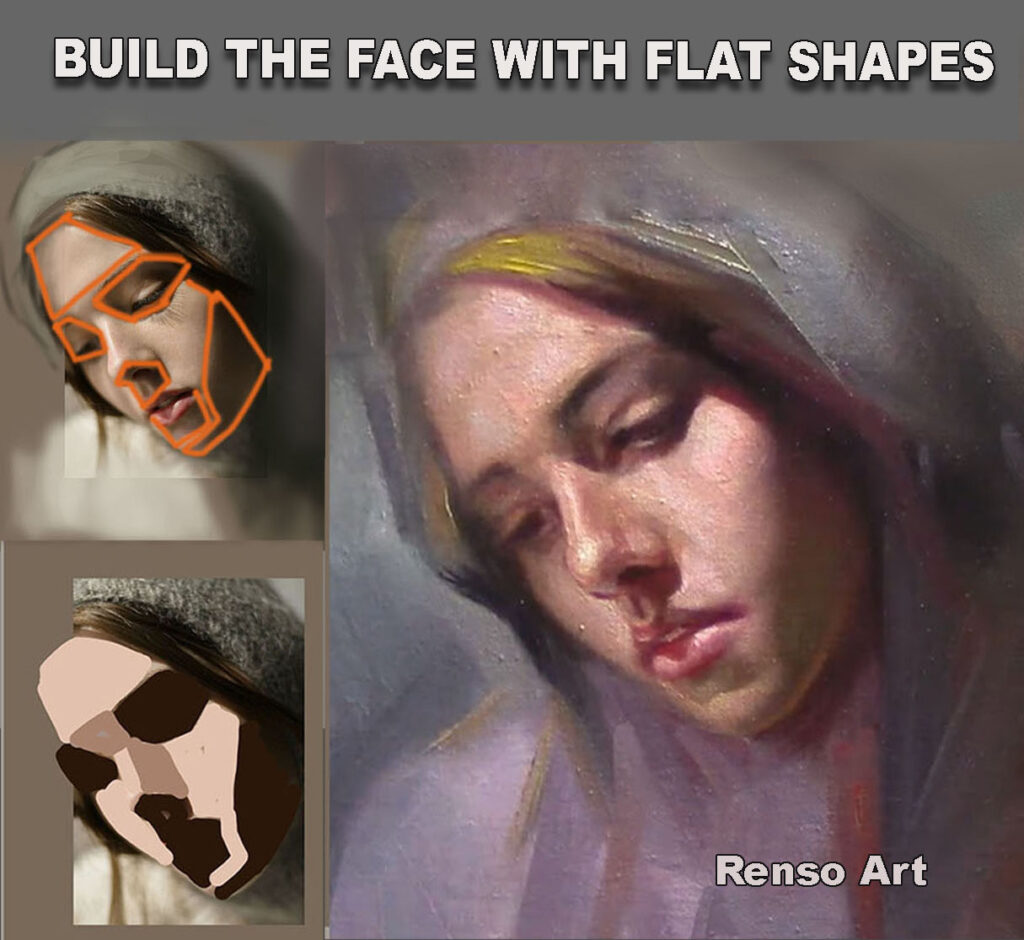
I remember my first drawings and paintings—they were full of details. I tried to paint every eyelash and every wrinkle, and I was always pretty happy with the result, even when my teachers used to say my paintings looked cartoonish and that the shadows were too light, which affected the volume of the face. I didn’t care at the time. But if you want to improve faster, stop trying to paint every single detail. You need simplification first. One of the most powerful ways to gain control and clarity in portrait art is to map the face using light and shadow planes and when you are good at that then paint all the details you want.
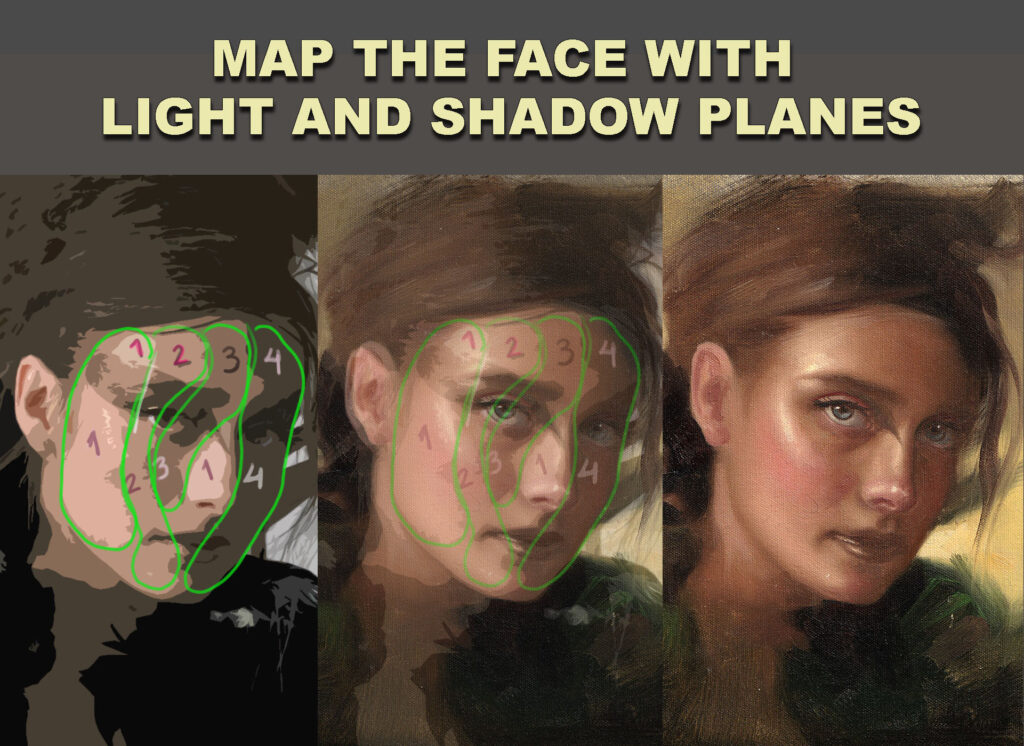
What Are Light and Shadow Planes?
The human face isn’t a flat surface—it’s made of intersecting planes that catch light differently depending on the form and light source. By breaking the face down into value-based planes (large areas of light or shadow), you can simplify the complexity and build a strong foundation for a realistic or stylized portrait.
Why Use Planes?
- Clarity: You’re not guessing where the shadows go—you’re placing them with purpose.
- Form: Planes help you sculpt the illusion of 3D on a 2D surface.
- Efficiency: Fewer details, more impact. A well-mapped face reads clearly even with minimal rendering.
- Lighting: You gain a better understanding of how different light sources affect facial structure.
How to Start Mapping Planes of the Face
- Choose a clear light source. A single light from the top or side works best to define major planes.
- Squint at your reference. This helps you see the simplified blocks of light and dark without distractions.
- Identify the five main zones:
- Forehead
- Eye sockets
- Nose
- Cheekbones
- Mouth and chin
- Block in flat values. Think of them as large, angular shapes. No blending—just tone masses.
- Refine gradually. Once your planes are solid, you can add transitions or details, but only as needed.
Think Like a Sculptor
Imagine you’re carving the face out of clay or wood. Planes help you carve with your brush or pencil, giving volume and depth instead of outlining features. Artists like John Singer Sargent, Andrew Loomis, and contemporary concept artists all use this method to bring portraits to life.
Final Thought
Details are the dessert—structure is the main course. Mapping light and shadow planes of the face gives your work strength, believability, and style. So next time you begin a portrait, don’t dive into eyelashes or smile lines. Start with planes, and let the light do the talking.
Want to see this technique in action? Join me in an upcoming paint-along class or check out my portrait demos on http://www.youtube.com/@RensoArt
“Let the light do the talking!”
“structure is the main course , details the dessert” !!!
Great quotes! Thank You!
This means a lot, thank you!
Thank you kindly!