Struggling with your portraits? You might find my E-book helpful. Click here
Learning to “see in planes” takes practice, but it’s one of the most rewarding skills you can develop as a portrait artist. During the time I practiced drawing the Asaro head, I think I never got one perfect. But my teacher encouraged me to just keep drawing. The goal wasn’t to get perfect angles on the face — the real practice was training our eyes and brain to see the planes naturally. And as a result, we started to clearly recognize the light, midtones, and shadows on any face we looked at.
Here are some simple exercises you can try to strengthen that skill:
1. Squint and Simplify
One of the easiest ways to start is by squinting at your reference or model. Squinting blurs the small details and helps you focus on the big masses of light and shadow. Ask yourself: Where does the light hit directly? Where does it turn away?
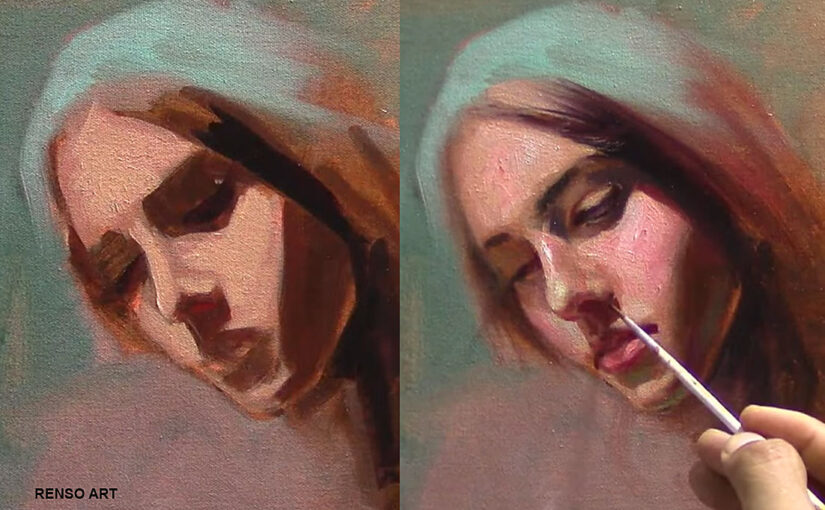
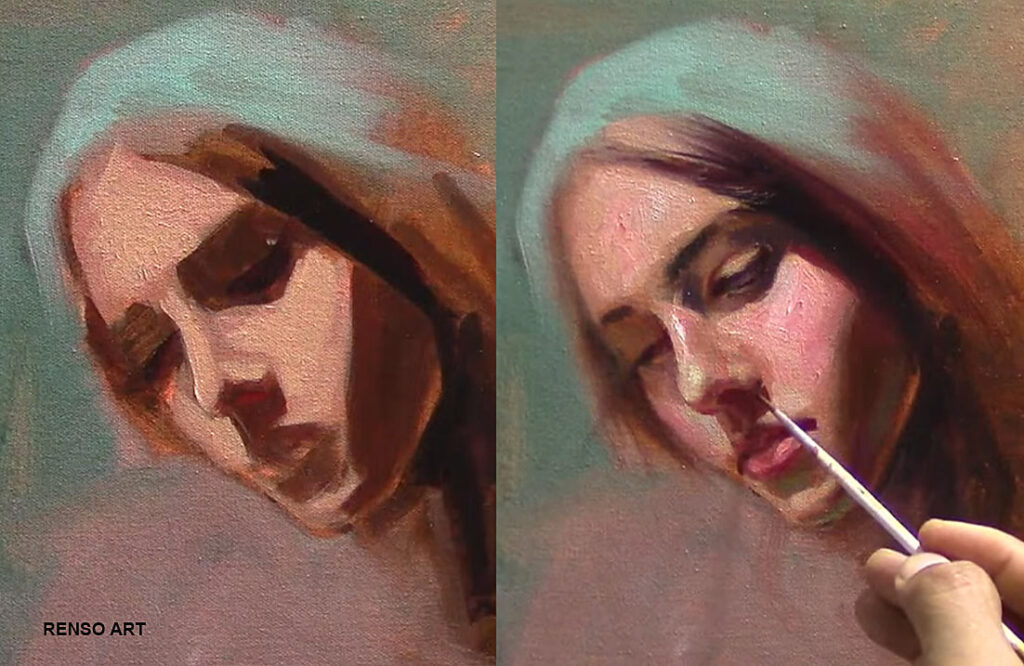
Try dividing the face into three tones — light, midtone, and shadow. This limited range forces you to simplify and think structurally, just like sculptors do before refining.
2. Draw the Head with Flat Planes
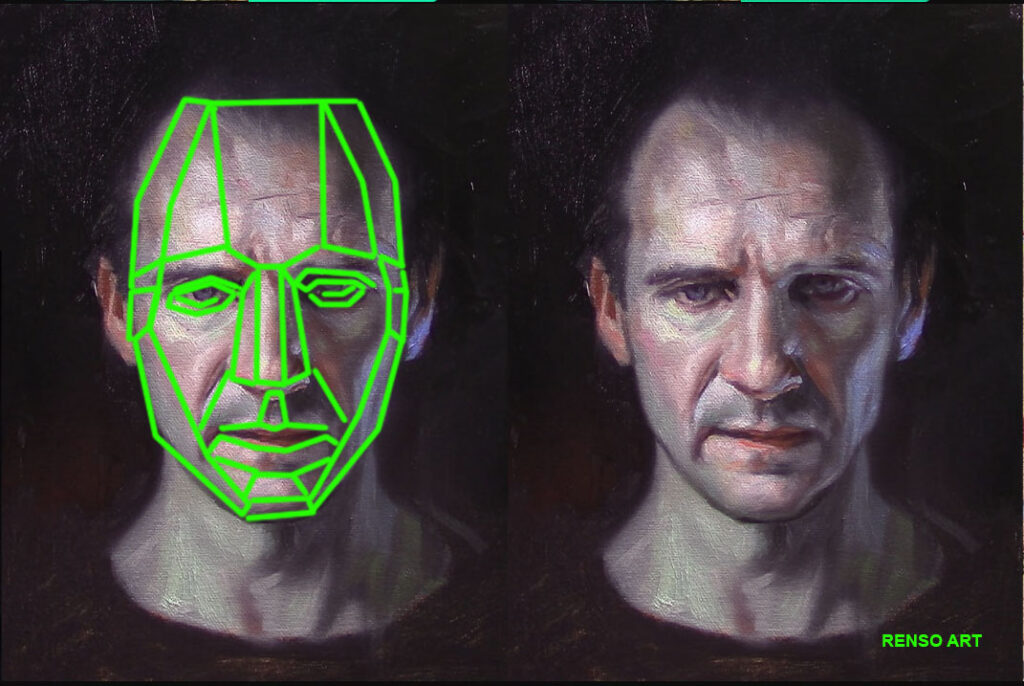
Instead of drawing curves, use straight lines to describe the head’s angles. Imagine you’re carving the face out of a block of wood.
Each straight line represents a plane change — the side of the nose, the slope of the forehead, the turn of the cheek.
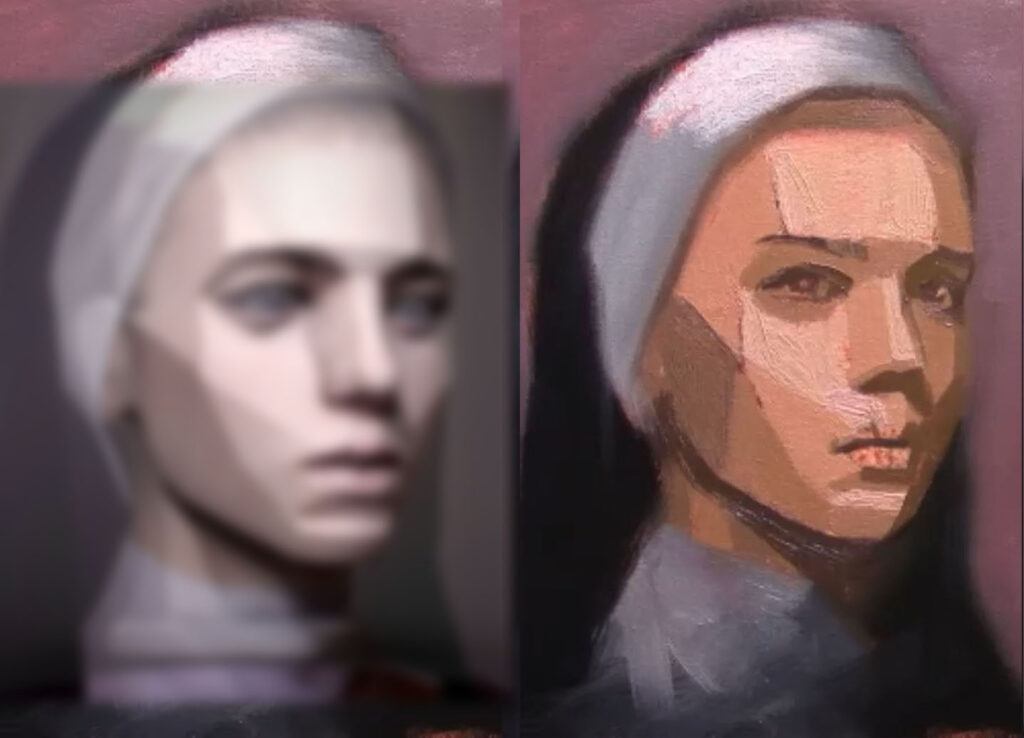
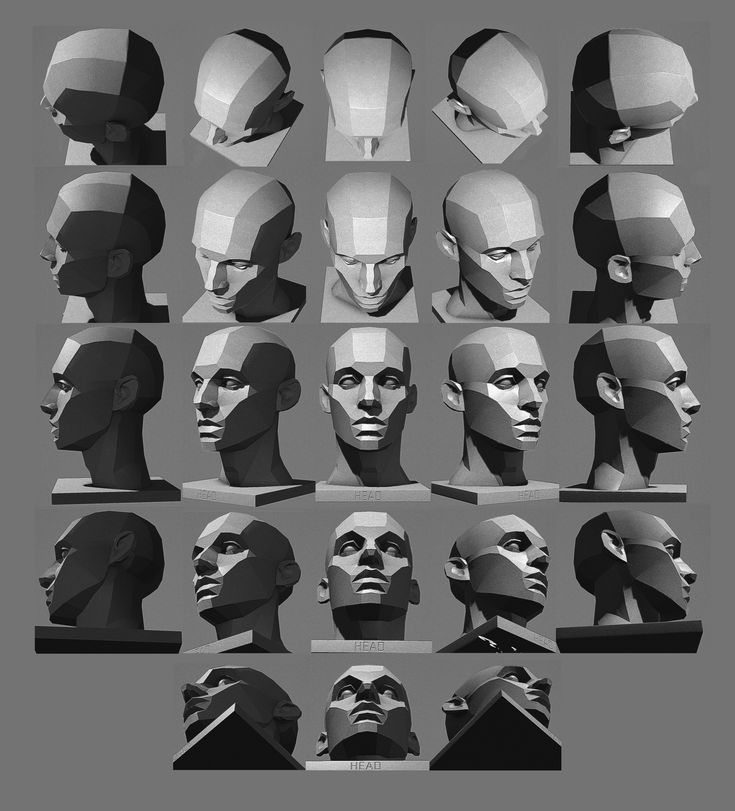
Start with a simple cube or wedge to understand how light falls on angular forms, then move on to a simplified head (like the Asaro Planes of the Head model). You can even paint over a photo digitally, tracing the major planes to see how light breaks across the surface.
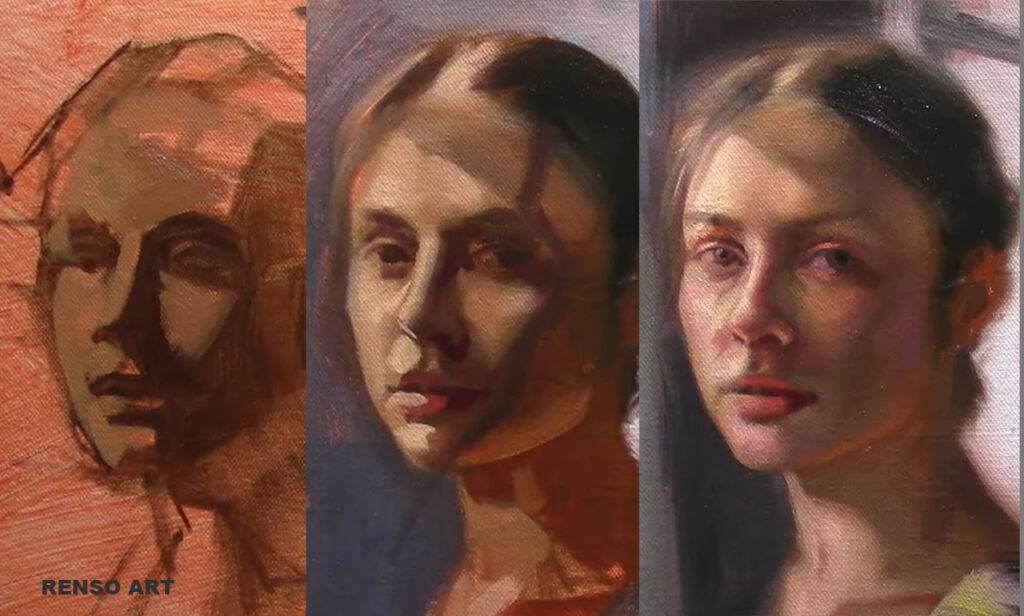
3. Paint in Three Values
Choose one of your portrait references and paint it using only three values: light, middle, and dark.
Forget about color — work in grayscale or with a very limited palette. The goal is to model the head using value relationships only. You’ll be surprised how much form and expression you can achieve with just three tones.
This exercise helps you understand that planes are what create the illusion of light, not fine details.
I painted this one Live in youtube: https://youtube.com/live/wxfxamniPaU
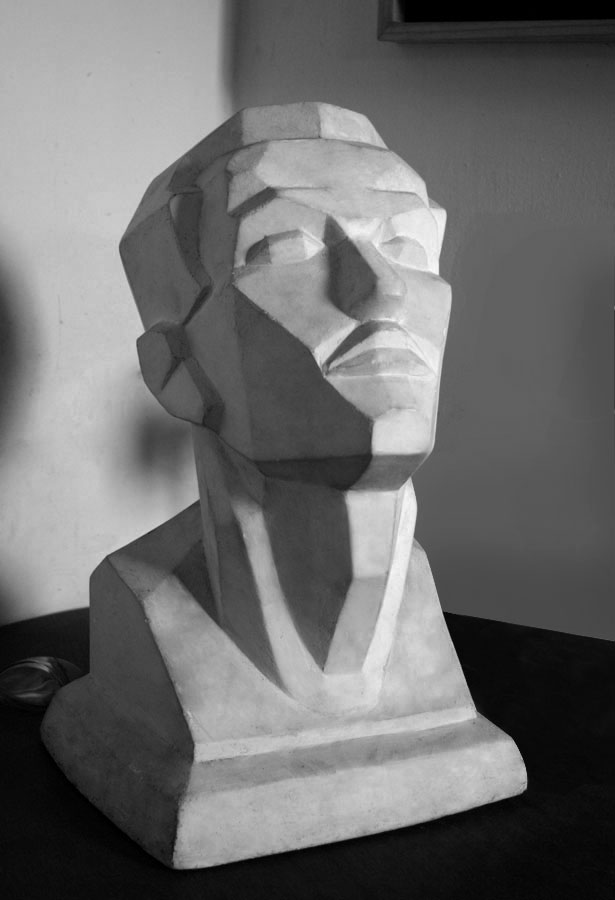
4. Study Sculptures or Casts
Painters throughout history have studied sculptures to understand structure. A plaster cast or a photo of a classical bust can be a great model for learning planes.
Since sculptures already emphasize form and light, they make it easier to spot where the head turns. Try sketching them quickly, noting the large shapes and where light breaks across them.
5. Turn the Head
When working from life or a reference, look at the head from different angles — front, three-quarter, and profile.
Notice how the planes shift with the light. This habit helps you understand that every portrait is a balance of structure and perspective.
The more you draw from multiple angles, the more confidently you’ll be able to invent or correct forms later.
6. Translate Planes into Soft Transitions
Once you can see the planes clearly, start softening them. Real faces aren’t made of hard edges, but understanding where those edges would be helps you create natural transitions.
Good portrait painting is all about knowing when to soften and when to keep a subtle edge — and that control begins with a solid sense of planes.
Final Thought
Seeing in planes transforms the way you paint. You stop copying what you see and start building your portraits as if you’re sculpting them with light. Over time, this understanding gives your paintings strength, clarity, and a sense of life that viewers can feel immediately.
These little lessons are the best! I am experimenting with a limited palate and tying to paint the planes first. Still struggling some with values however.