Struggling with your portraits? You might find my E-book helpful. Click here
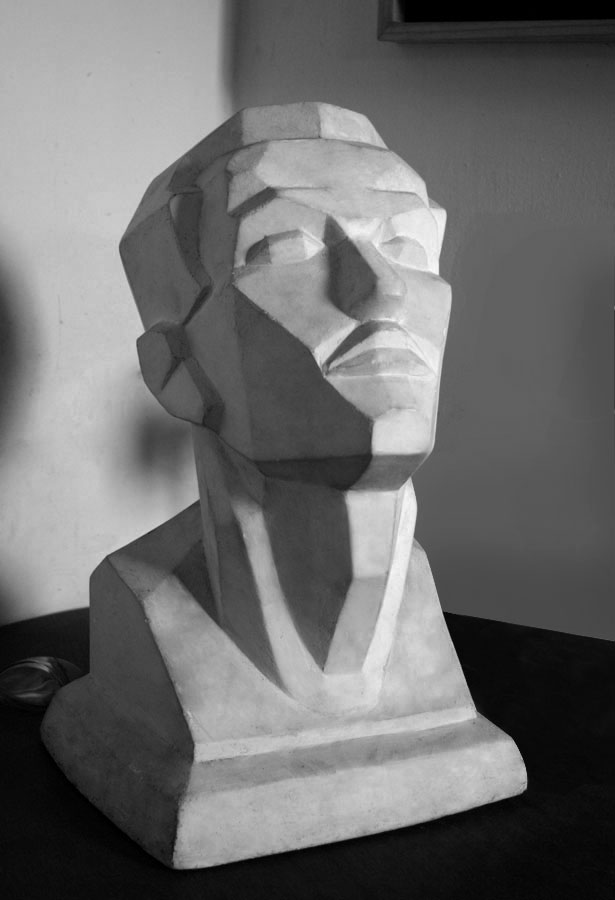
When I was a student I used to practice with a real planar sculpture. the teacher placed the light on the left, rotated the sculpture every 10 minutes, and we sketched with charcoal. After five drawings, He moved the light to the right and repeated the process. It was a practice we used to do once a week. Do not think about perfection is practice, maybe you will find this exercises pretty stressful but practice always pay off.
Understanding the planes of the face is essential for creating convincing portraits. But knowing the planes alone isn’t enough—lighting determines how those planes are revealed or concealed. Different lighting setups dramatically affect how we perceive form, structure, and depth in a portrait.
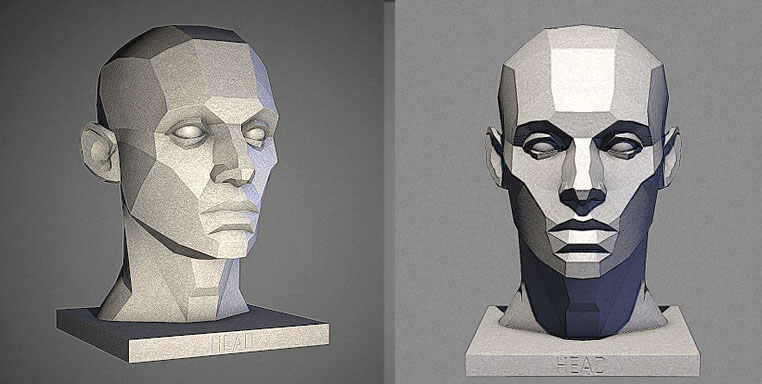
These are the three lighting setups I practiced as a student, we will see how—front light, rim light, and Rembrandt lighting—interact with the planes of the face. Whether you’re drawing, painting, or sculpting, learning to observe these interactions will help you better capture the illusion of form.
There are more lighting setups than the ones I show in this article, but these are the foundation.
Here is a Planar head I have at home, I did it myself in my first year at the school of art.
🎯 What Are the “Planes of the Face”?
The human face isn’t a flat surface. It’s composed of angled planes—like the slope of the forehead, the curved structure of the cheekbones, or the boxy chin. When light hits these planes at different angles, it reveals form through contrast between light and shadow. That’s what gives a portrait its 3D illusion.
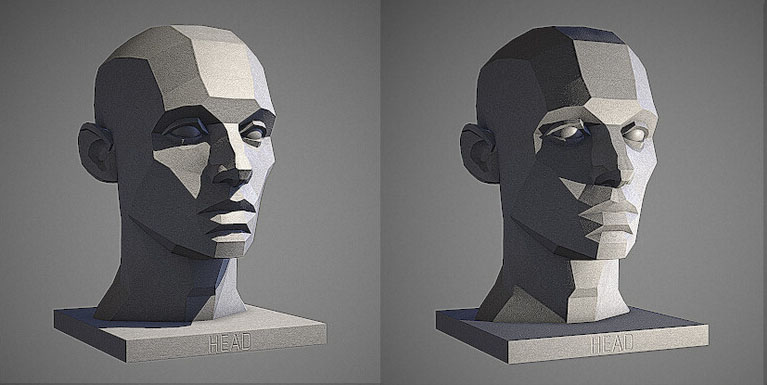
🔦 1. Front Lighting (Flat Light)
I do not like this lighting, we can not see shadows but we need to practice this because we will commissions from photos with this lighting. What I just to do is darken the picture with photoshop to see midtones and shadows

Overview:
- Light is positioned directly in front of the face.
- Often used in photography for beauty shots or ID photos.
- Minimizes shadows, giving a smooth, evenly lit appearance.
Effect on Planes:
- Flattens form: Since all planes receive similar amounts of light, depth is reduced.
- Subtle transitions: Shadow areas are minimal, so changes between planes become harder to see.
- Good for studying color and tone, but not ideal for structural learning.
Best Use:
- Reference photos for soft skin tones or subtle shading practice.
- Early stages of painting to block in color without distraction.
🌗 2. Rembrandt Lighting
This one is the best for a beginner, is necessary to see contrast to separate the lights from shadows when mix colors.

Overview:
- Light is placed at ~45° from the subject and above eye level.
- Named after the painter Rembrandt, known for his dramatic portraits.
- Creates a triangle of light on the cheek opposite the light source.
Effect on Planes:
- Strong light-shadow contrast: One side of the face is lit, the other falls into shadow.
- Planes facing the light (forehead ridge, cheekbone, upper lip) catch highlights, while perpendicular planes recede into shadow.
- The “core shadow” (where light transitions to shadow) clearly defines the form.
Best Use:
- Ideal for studying facial structure and form modeling.
- Adds drama and realism to a portrait.
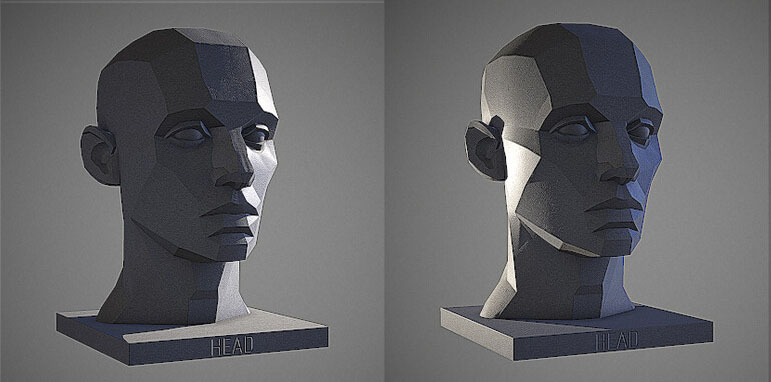
🌙 3. Rim Lighting (Back or Edge Light)
This one is the best when we want to be creative about color, I usually add color to one of the lights, could be orange or blue or any color or a different color for each side.

Overview:
- Light comes from behind or the side, grazing the edge of the face.
- Often used in cinematography and dramatic portraits.
- Creates a glowing outline or “halo” effect.
Effect on Planes:
- Highlights edges, but leaves the front planes in shadow.
- Obscures form in the central areas of the face.
- Excellent for emphasizing silhouette and profile, but poor for revealing internal structure.
Best Use:
- Stylized or mysterious portraits.
- Studying facial outline and gesture rather than internal planes.
🎨 Side-by-Side Summary of Planes of the face
| Lighting Type | Form Visibility | Shadow Contrast | Best For |
|---|---|---|---|
| Front Light | Low (flattens form) | Minimal | Color study, soft portraits |
| Rembrandt Lighting | High (reveals form) | Strong | Structure, realism, drama |
| Rim Light | Low (edge-focused) | High at edges | Silhouette, mood, stylization |
🧠 Final Thoughts
As artists, we don’t just copy what we see—we interpret and design. Understanding how lighting affects the planes of the face empowers you to choose references more wisely, control your compositions, and make more convincing portraits.
Next time you work from a reference or live model, ask yourself:
Which planes are catching light? Which are turning away? And how is this lighting setup helping—or hiding—the form?
Let light be your teacher, and the planes of the face your map.
Good teaching, Renso! You always explain really clearly.
This article provides a solid foundation for understanding lighting setups, but I wonder if there are more advanced techniques you could explore. The method of rotating the sculpture every 10 minutes seems tedious, but I can see how it would help in mastering light and shadow. I’m curious, how long did it take you to feel confident with this practice? The mention of using Photoshop to darken the picture for midtones and shadows is a great tip—do you have any other editing tricks for beginners? I agree that contrast is crucial for separating lights and shadows, but how do you handle subtle lighting situations? Adding color to the lights for creativity is fascinating—what’s your favorite color combination to use? Overall, this is a great guide, but I’d love to hear more about your personal experiences and challenges with these techniques. What’s the most common mistake beginners make when starting with lighting setups?